Yet another green screen!

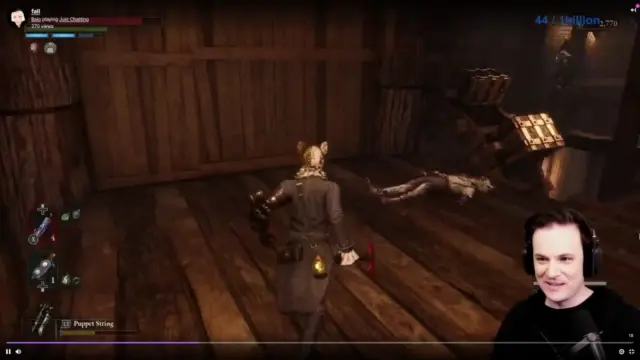
Lately I’ve been working a lot in my spare time on a new look for my twitch stream. Inspired by the look of Bajo and others, I wanted to super-impose myself onto the corner, as Bajo will now demonstrate:

I decided that a virtual ‘green screen’ effect would be ideal because who has space for a real green screen? In this economy 💵? No way.
There is an existing Python script to do this and the background removal plugin for OBS, however I wanted:
- minimal latency between capture and render;
- to scale CPU usage or even offload to GPU (I stream and game with a laptop), and;
- the most up-to-date segmentation model.
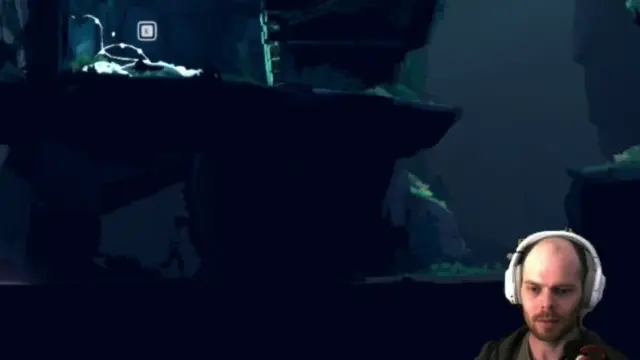
The end result is linuxgreenscreen 🟩. And what does it look like you ask? Well here you go!

And it’s truly ‘more green’, like-for-like it uses less power than Linux-Fake-Background-Webcam:
| linuxgreenscreen | Linux-Fake-Background-Webcam | |
|---|---|---|
| CPU | 129% | 385% |
| MEM | 1.6% | 2.3% |
Source: snapshot from htop on my laptop.
How to use
For now it is very bare bones 🦴, to run the green screen:
- install the module via git;
- set up a virtual device via v4l2loopback;
- run a demo script at 1280x720 (MJPEG input) at 30FPS;
- access the virtual device as you would any ordinary webcam (e.g. OBS V4L2 capture).
pip install git+ssh://git@gitlab.com/stephematician/linuxgreenscreen.git
sudo modprobe v4l2loopback devices=1 video_nr=10
python3 -m linuxgreenscreen.demo
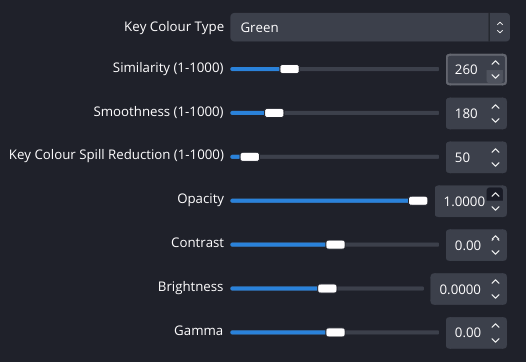
I apply the Chroma key filter from OBS with the following settings:

I will improve the user interface soon (see § Future plans below).
Technical details
linuxgreenscreen asynchronously processes the green overlay. This is, in my opinion, a huge advantage over other efforts. The image captured by the webcam is displayed almost immediately, while the latest green overlay is incorporated as soon as it is available. The frequency of overlay updates can be tuned to reduce CPU usage (a trade off between work and temporal precision).
For webcams that use MJPG (often the case for high resolution/FPS on USB)
libjpeg-turbo is used directly via
PyTurboJPEG, which performs faster and uses less power than
OpenCV’s imdecode.
The module uses MediaPipe’s selfie segmentation, via the latest (at time of writing) image segmentation API. GPU offloading is also possible if MediaPipe is built accordingly.
Composition
In order to get a useful (fake) green screen overlay, the segmentation (tensor) result for each frame needs to be post-processed. The following steps are performed on the 144x256 segmentation ‘confidence mask’ tensor:
- Dilation. Takes the maximum over each neighbourhood of a pixel. Default size = 3.
- Blur. Apply a box filter. Default kernel width = 7.
- Rolling maximum. Take the maximum value for each pixel from
npreceding frames; with an optional decay rate for the preceding framges. Defaults uses 1 previous frame, with a decay rate = 0.9. - Resize. Stretch the tensor to the input image size using linear interpolation.
- Threshold. Get a binary value from the (continuous) confidence mask. Default = 0.25.
The first three operations are performed using np.float32 arithmetic, while
the resize and threshold steps occur after conversion to np.uint8.
Performance
Depending on your taste, I thought the overlay quality was acceptable when updating every second frame of 1280x720 30FPS MJPG input, which used ≤85% of one core on my laptop’s Ryzen 9 4900HS. The time taken for MediaPipe’s segmentation and the post-processing operations was about 11-12ms, meaning that the green overlay was available at up to 80-90FPS. Similar times for segmentation are recorded in the segmentation documentation.
Future plans
Briefly, here are some things I’ll work on next:
- Add UI (via Tk) so that the user can adjust the source camera settings, and select pre-defined/user profiles for the composition.
- Make output available to OBS directly via a plugin using shared memory and memory mapped files.
Acknowledgements
The module was, clearly, inspired by the work of;
- Fufu Fang who wrote the Linux-Fake-Background-Webcam scripts.
- Benjamin Elder’s earlier work presented in the blog post titled ‘Open Source Virtual Background’.
Also thank you to:
- hacker24601 for patiently waiting for me to get back on stream.